Using packages
Centreon provides RPM packages for its products through the Centreon open source version available free of charge in our repository.
These packages have been successfully tested in version 7.x CentOS and Red Hat environments.
Pre-installation steps
First, SELinux should be disabled. To do this, you have to edit the file /etc/selinux/config and replace enforcing by disabled:
SELINUX=disabled
Note
After saving the file, reboot your operating system to apply the changes.
Perform a quick check of the SELinux status:
$ getenforce
Disabled
Installing the repository
Redhat Software Collections Repository
To install Centreon you will need to set up the official software collections repository supported by Redhat.
Note
Software collections are required for installing PHP 7 and associated libraries (Centreon requirement).
Install the software collections repository using this command:
# yum install centos-release-scl
The repository is now installed.
Centreon repository
To install Centreon software from the repository, you should first install the centreon-release package, which will provide the repository file.
Install the Centreon repository using this command:
# yum install -y http://yum.centreon.com/standard/19.04/el7/stable/noarch/RPMS/centreon-release-19.04-1.el7.centos.noarch.rpm
The repository is now installed.
Note
Some may not have the wget package installed. If not perform the following:
# yum install wget
Installing a Centreon Central Server
This section describes how to install a Centreon central server.
Installing a Centreon Central Server with database
Run the command:
# yum install centreon
# systemctl restart mysql
Installing a Centreon Central Server without database
Run the command:
# yum install centreon-base-config-centreon-engine
Installing MySQL on the dedicated server
Run the commands:
# yum install centreon-database
# systemctl daemon-reload
# systemctl restart mysql
Note
centreon-database package installs a database server optimized for use with Centreon.
Note
Centreon does not support the SQL STRICT mode yet. Please make sure that it is disabled. For more information on how to disable the mode please check the official MariaDB documentation.
Then create a distant root account:
mysql> CREATE USER 'root'@'IP' IDENTIFIED BY 'PASSWORD';
mysql> GRANT ALL PRIVILEGES ON *.* TO 'root'@'IP' WITH GRANT OPTION;
mysql> FLUSH PRIVILEGES;
Note
Replace IP by the public IP address of the Centreon server and PASSWORD by the root password.
Warning
When running a PHP version before 7.1.16, or PHP 7.2 before 7.2.4, set MySQL 8 Server’s default password plugin to mysql_native_password or else you will see errors similar to The server requested authentication method unknown to the client [caching_sha2_password] even when caching_sha2_password is not used.
This is because MySQL 8 defaults to caching_sha2_password, a plugin that is not recognized by the older PHP releases. Instead, change it by setting default_authentication_plugin=mysql_native_password in my.cnf.
Change the method to store the password using following command:
mysql> ALTER USER 'root'@'IP' IDENTIFIED WITH mysql_native_password BY 'PASSWORD';
mysql> FLUSH PRIVILEGES;
Once the installation is complete you can delete this account using:
mysql> DROP USER 'root'@'IP';
Database management system
We recommend using MariaDB for your database because it is open source. Ensure the database server is available to complete the installation (locally or no).
It is necessary to modify LimitNOFILE limitation. Do not try to set this option in /etc/my.cnf because it will not work.
Run the commands:
# mkdir -p  /etc/systemd/system/mariadb.service.d/
# echo -ne "[Service]\nLimitNOFILE=32000\n" | tee /etc/systemd/system/mariadb.service.d/limits.conf
# systemctl daemon-reload
# systemctl restart mysql
Setting the PHP time zone
You are required to set the PHP time zone. Run the command:
# echo "date.timezone = Europe/Paris" > /etc/opt/rh/rh-php71/php.d/php-timezone.ini
Note
Change Europe/Paris to your time zone. You can find the supported list of time zone here.
After saving the file, please do not forget to restart the PHP-FPM server:
# systemctl restart rh-php71-php-fpm
Configuring/disabling the firewall
Add firewall rules or disable the firewall by running the following commands:
# systemctl stop firewalld
# systemctl disable firewalld
# systemctl status firewalld
Launching services during system bootup
To make services start automatically during system bootup, run these commands on the central server:
# systemctl enable httpd24-httpd
# systemctl enable snmpd
# systemctl enable snmptrapd
# systemctl enable rh-php71-php-fpm
# systemctl enable centcore
# systemctl enable centreontrapd
# systemctl enable cbd
# systemctl enable centengine
# systemctl enable centreon
Note
If the MySQL/MariaDB database is on a dedicated server, execute this command on the database server:
# systemctl enable mysql
Concluding the installation
Before starting the web installation process, you will need to execute the following commands:
# systemctl start rh-php71-php-fpm
# systemctl start httpd24-httpd
# systemctl start mysqld
# systemctl start cbd
# systemctl start snmpd
# systemctl start snmptrapd
Configuration
Note
To get the IP address of your Centreon server, uses the command:
# ip addr
Log in to Centreon web interface via the URL: http://[SERVER_IP]/centreon. The Centreon setup wizard is displayed. Click on Next.

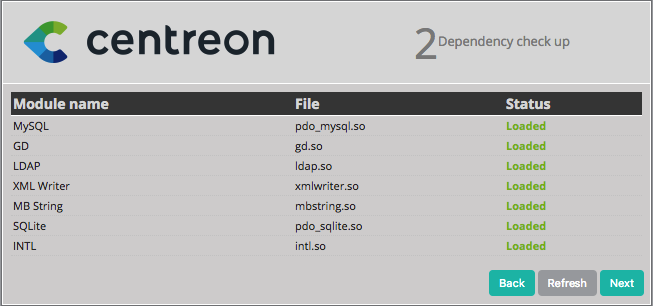
The Centreon setup wizard checks the availability of the modules. Click on Next.
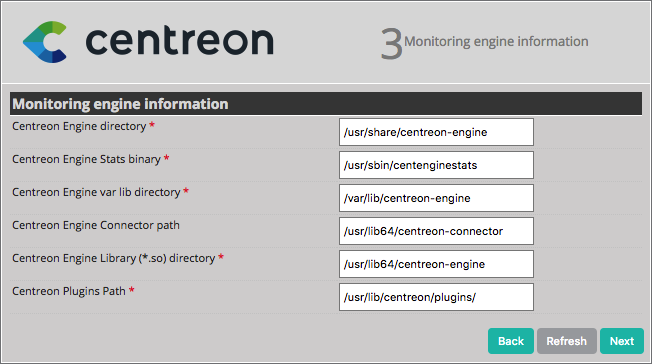
Click on Next.
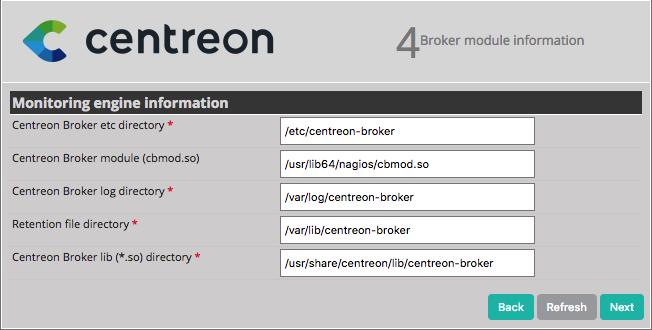
Click on Next.
Provide the information on the admin user, then click on Next.

By default, the localhost server is defined and the root password is empty. If you use a remote database server, change these entries. In this case, you only need to define a password for the user accessing the Centreon databases, i.e., Centreon. Click on Next.

Note
If the “Add innodb_file_per_table=1 in my.cnf file under the [mysqld] section and restart MySQL Server.” error message appears, perform the following operations:
Log in to the root user on your server.
Modify this file:
/etc/my.cnf
Add these lines to the file:
[mysqld]
innodb_file_per_table=1
Restart the mysql service:
# systemctl restart mysqlClick on Refresh.
Note
If you use a deported MySQL v8.x DBMS, you may have the following error message: error. Please have a look to this procedure to solve this issue.
The Centreon setup wizard configures the databases. Click on Next.

You will now be able to install the Centreon server modules.
Click on Install.

Once installation is complete, click on Next.

At this point, an advertisement informs you of the latest Centreon news and products. If your platform is connected to the internet, the information you receive will be up to date. If you are not online, only information on the current version will be displayed.
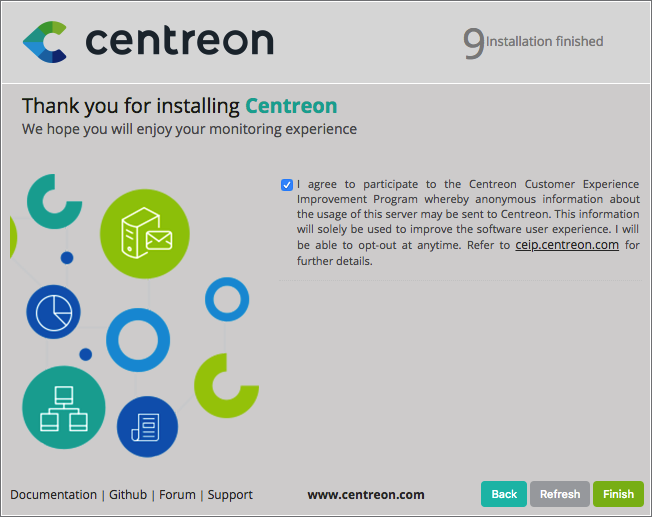
The installation is complete. Click on Finish.
You can now log in.

Initialization of the monitoring
To start the monitoring engine:
From your web interface, go to Configuration > Pollers.
Keep the default options and click on Export configuration.
Select Central poller from the box input Pollers.
Uncheck Generate Configuration Files and Run monitoring engine debug (-v).
Check Move Export Files and Restart Monitoring Engine with the Restart option selected.
Click on Export again.
Log on to the root user on your server.
Start Centreon Broker:
# systemctl start cbdStart Centreon Engine:
# systemctl start centengineStart centcore:
# systemctl start centcoreStart centreontrapd:
# systemctl start centreontrapd
Monitoring is now working. You can begin monitoring your IT system.
To automatically start services at system bootup, run these commands on the central server:
# systemctl enable centcore
# systemctl enable centreontrapd
# systemctl enable cbd
# systemctl enable centengine
# systemctl enable centreon
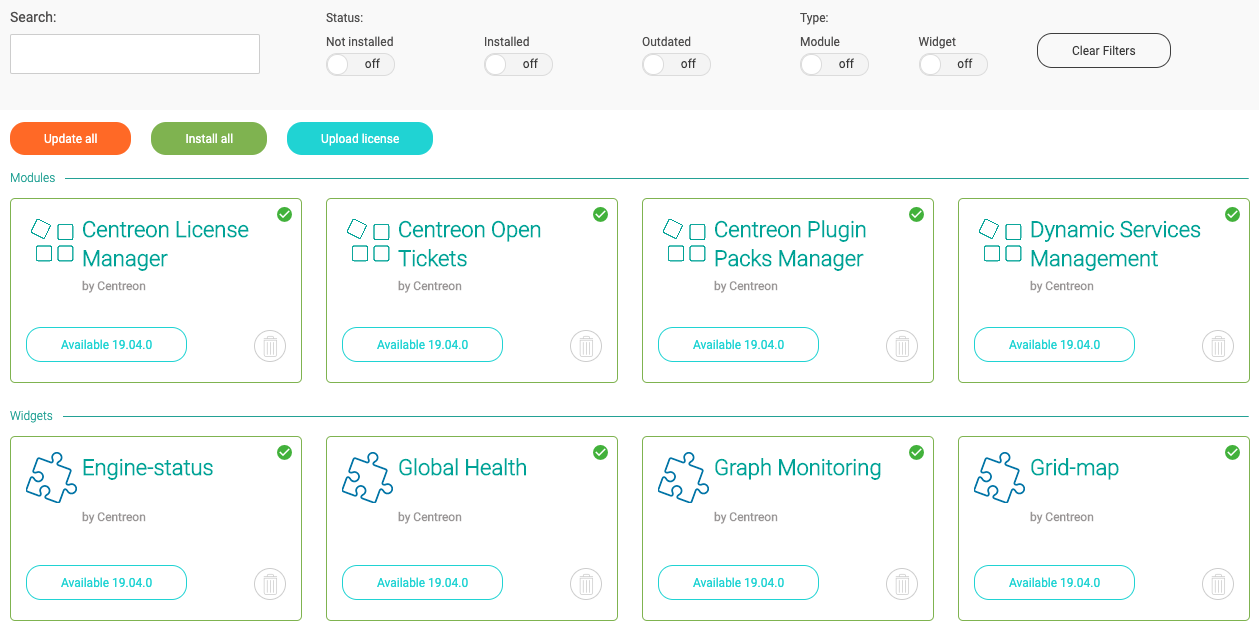
Installation of available extensions
Go to Administration > Extensions > Manager menu and click on Install all:
Quick start
Go to the quick start chapter to configure your first monitoring.